
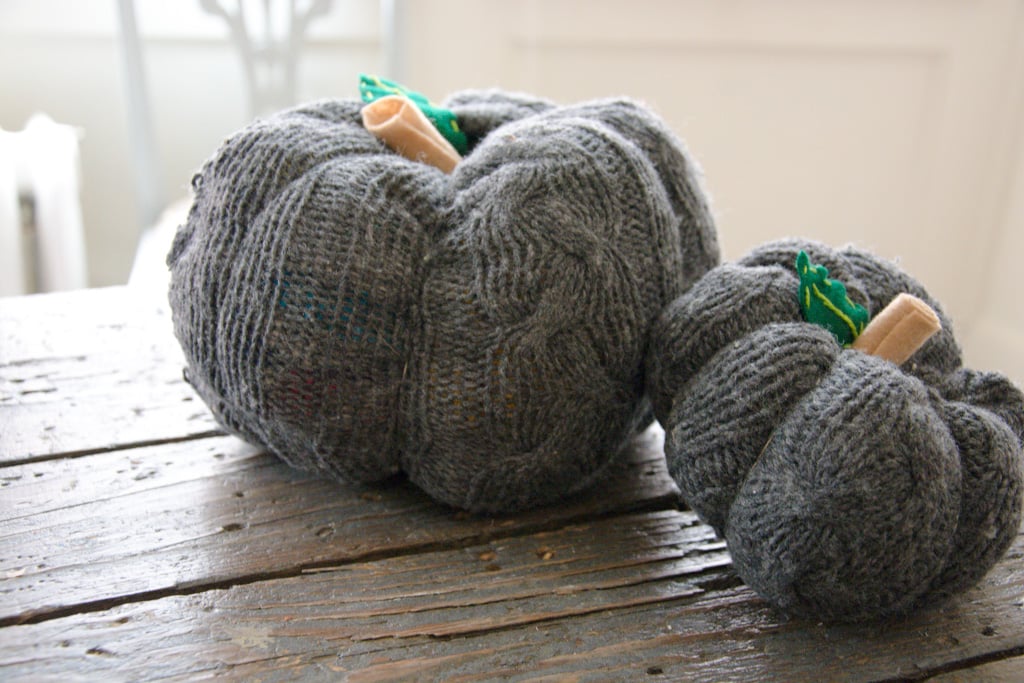
In the midwest, it’s time to face the facts. It’s fall. In fact, it’s been fall for a while now. We’ve been layering up and breaking out the sweaters. Speaking of sweaters, if you've browsed Pinterest for simple fall crafts, you've likely seen these cute pumpkins made from sweaters. We decided to give them a try with our own sweater find.
Supplies
- Goodwill sweater ($4.49)
- Scissors
- Stuffing
- Felt
- Strong yarn or thick thread (check the plastics aisle at Goodwill for this kind of craft supply)
- Long needle
- Glue
- 2 Rubber bands per pumpkin
- 1 Button
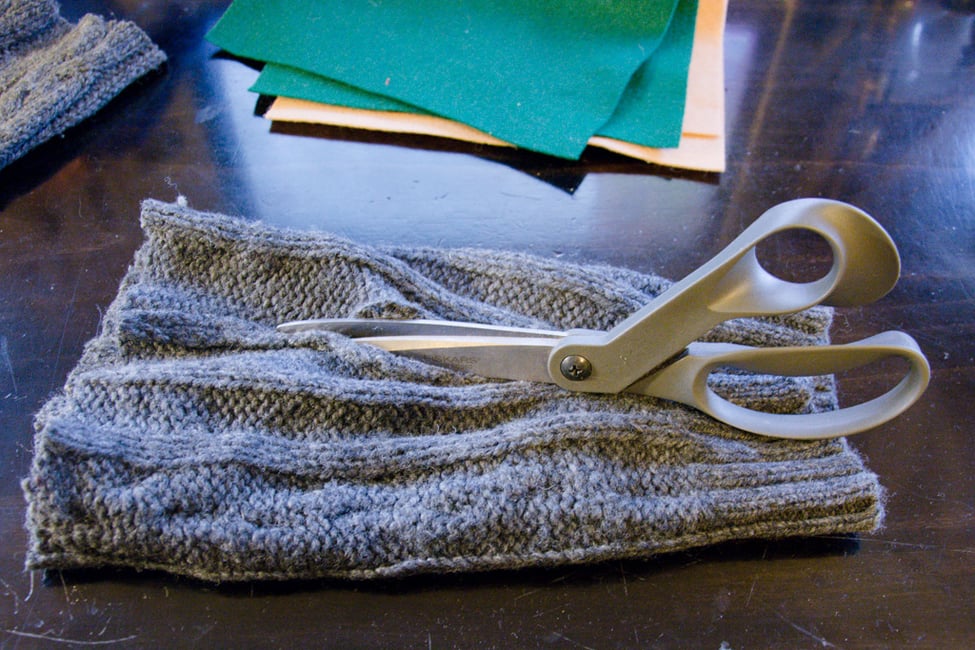
Step one: Sleeves
Cut off the sweater sleeves. Very simple. Start from the bottom seam connecting the arm to the body of the sweater and just cut a straight line up. The sweater will look like it's been given cap-sleeves. For a large pumpkin, use a full sleeve, and for a smaller one—cut the sleeve in half. Turn your sleeve inside-out and lay it flat. Find its seam running the length of the sleeve. Cut a small slit in that seam. Do your best to stay in the seam so you don’t have to deal with an unraveling sweater.
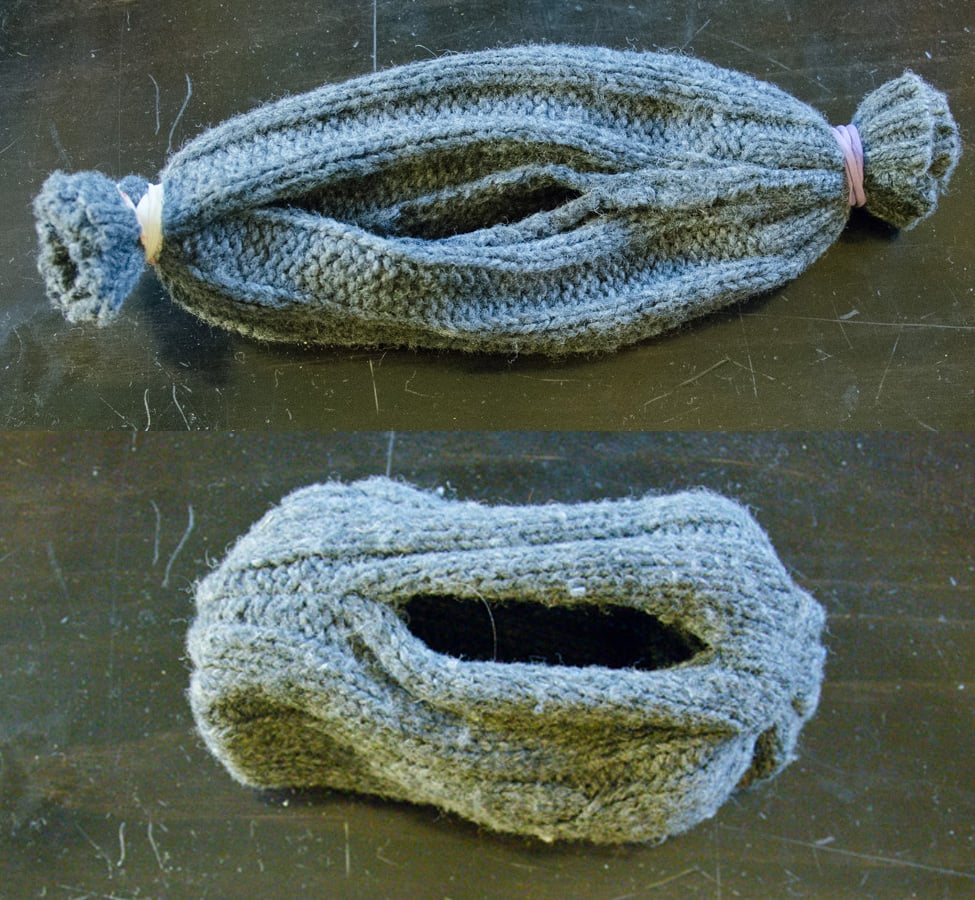
Step two: Pumpkin body
Rubber band the two ends of your sleeve. Flip the sleeve right-side out through the slit in the seam.
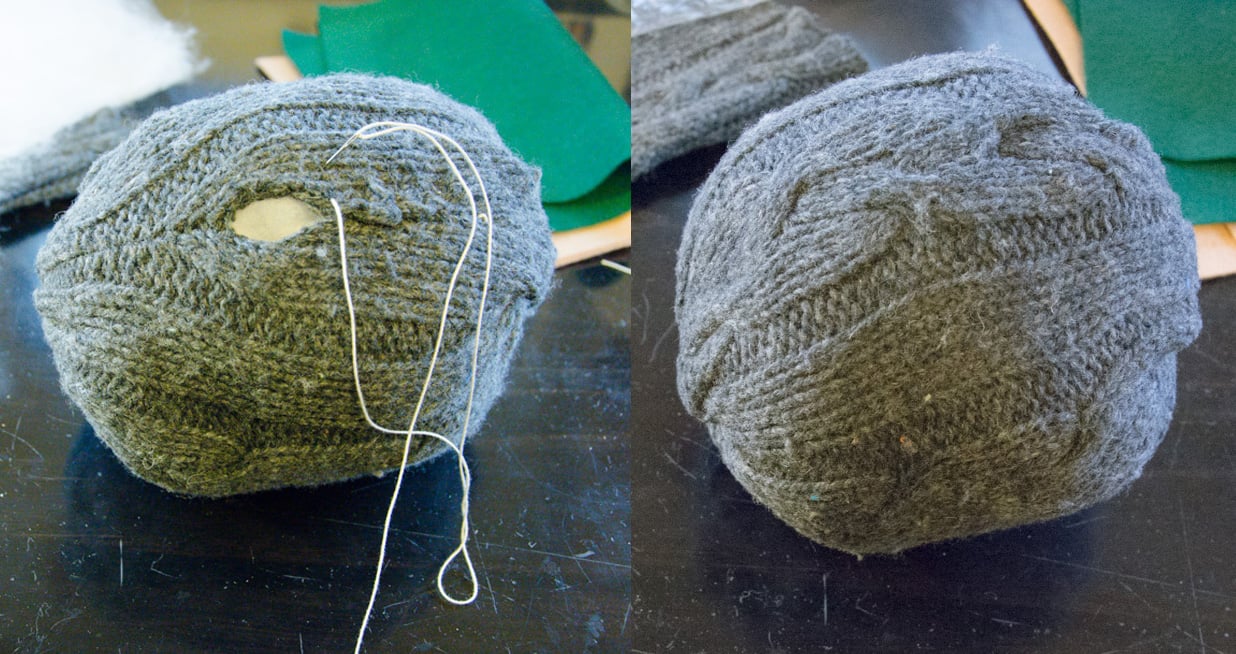
Step three: Pump up the pumpkin
Stuff the flat pumpkin body until it’s a nice plump oval. Once it’s thoroughly stuffed, ladder stitch the seam or just do your best to seal the pumpkin up.
Step four: The middle
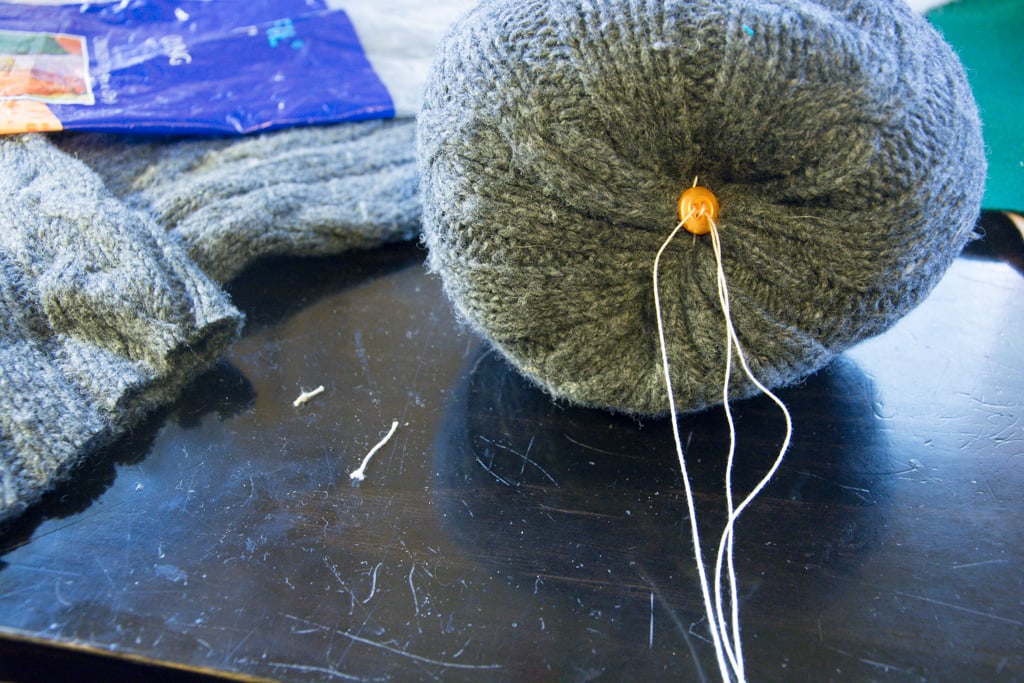
Taking the thick thread, needle, and button—secure the button onto one end of the thread (the knotted end), and thread the needle with the loose end. The button will be the pumpkin “top.” While squishing the pumpkin top and bottom together, poke the needle through and bring it to the opposite side and pull tight.
Go back and forth, securing the button onto the pumpkin while continuously pulling tight.
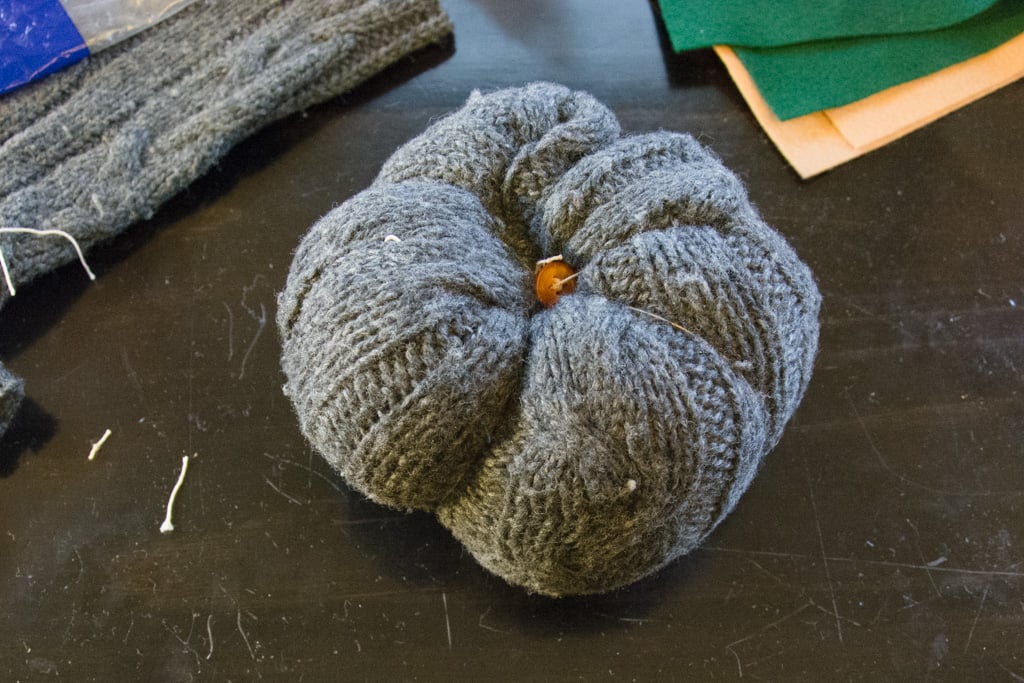
Step five: Pumpkin humps
Now that the middle is secure, string the needle with a long piece of thick thread and always starting and finishing in the middle, go around the pumpkin giving it its veins, which create the cute pumpkin humps. Do this 4-6 times, however many you like. Once the pumpkin is shaped as desired, secure the thread—either knotting it at the bottom or use the button to secure and knot around.
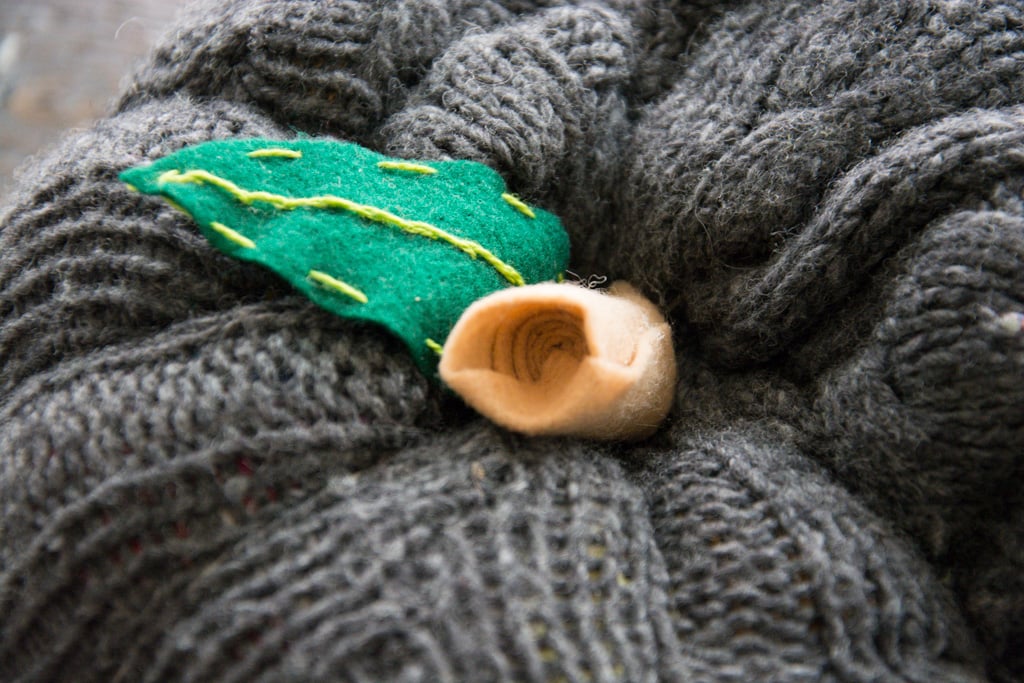
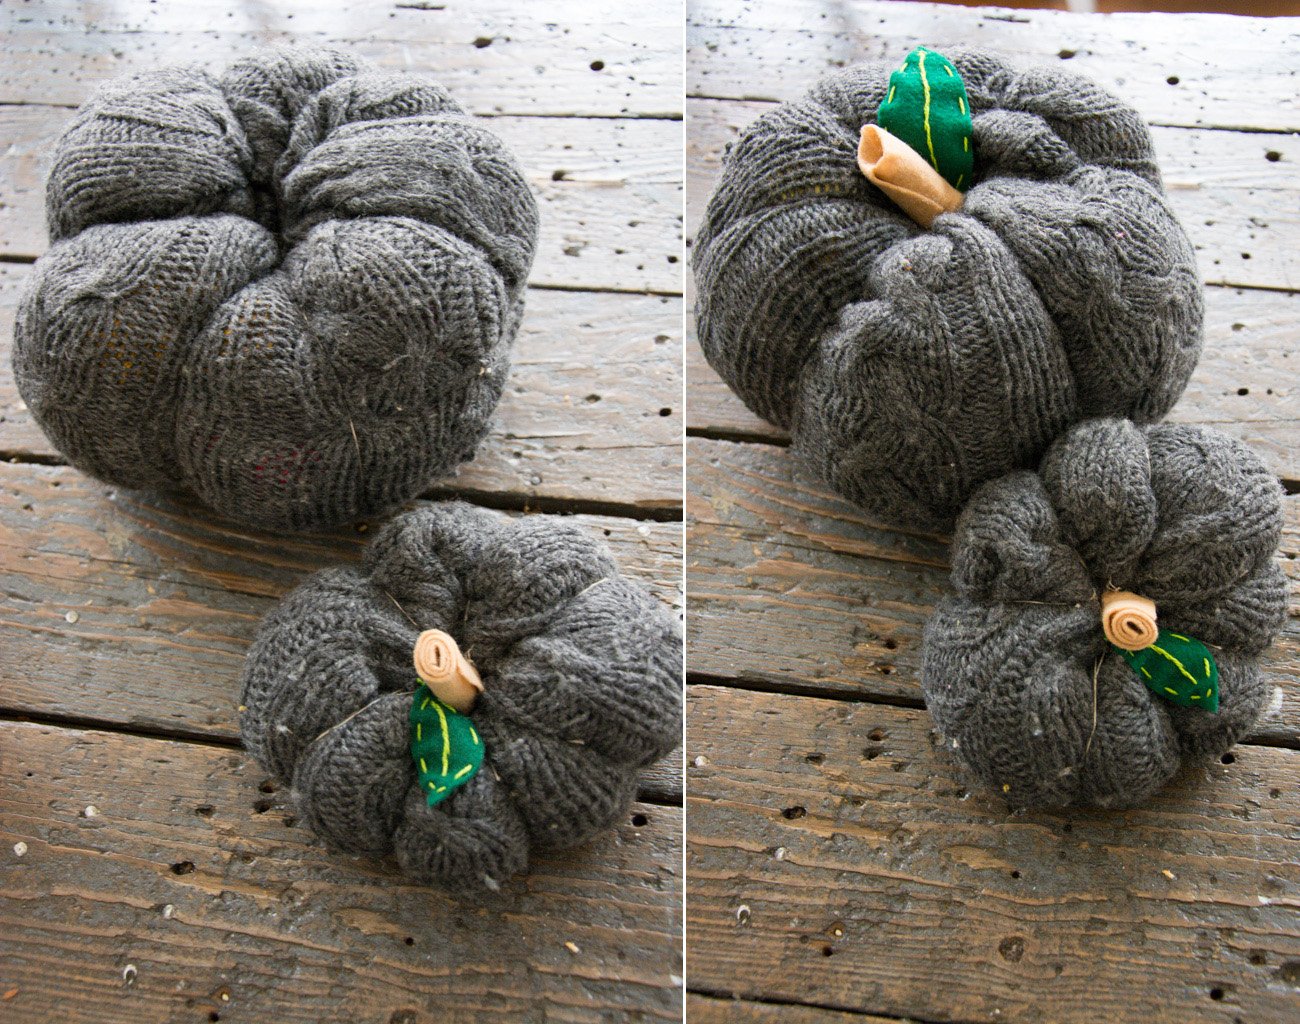
Step six: Leaf and stem
For the leaf - it can be as simple or elaborate as desired. For my own, I opted to use embroidery floss to give the leaf some character with a center running stitch and simple stitches around the outside of the leaf. Secure the leaf to the middle of the pumpkin with some thread.
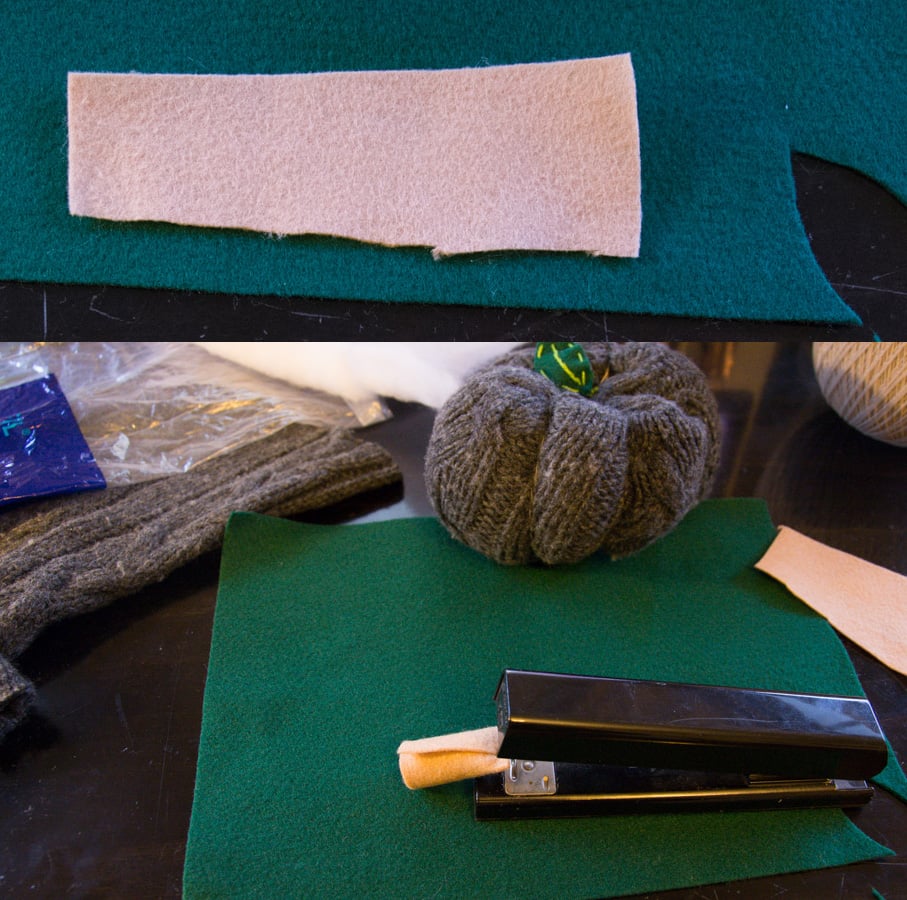
Next, cut a strip from the felt for the stem and roll it. Staple (or sew, or glue) the bottom of the roll, pinching it together. Glue the pinched part to the Pumpkin’s button.
If there is a top triangle on the stem, fold it inward and glue it down.
And it's done!
The bottom of the pumpkin compared to the top part is shown below as is the size comparison of a full sleeve vs a half sleeve.
For a brighter pumpkin, simply use a brighter sweater. Just remember, plush pumpkins certainly don’t need to be orange. Have fun with it!